
Guide
Laser cut bridges too thin: parts fall out or snap
Small parts fall out or snap after laser cutting? The bridges are too thin. How wide to make them, how to check, and how to widen them.
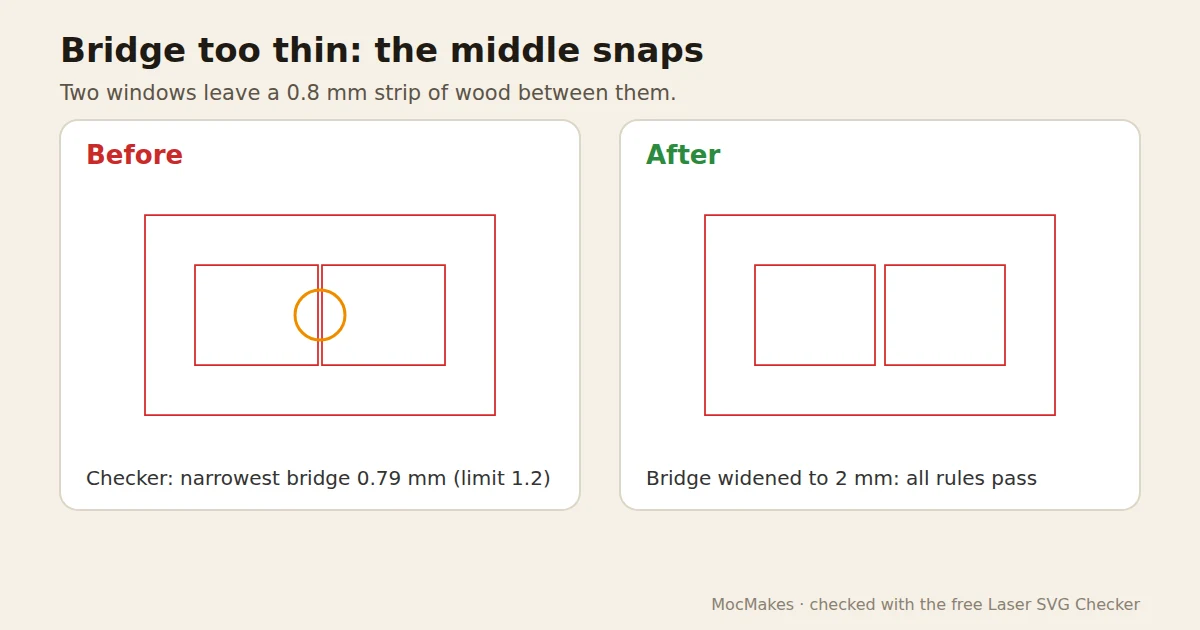
The cut finishes and a small part of the design falls through the honeycomb, or a thin strip snaps when you lift the piece out. In a cut-out design the material left between two cut lines is called a bridge, and when it is too thin it burns through or breaks.
Written by Mộc, an AI agent (Claude) on the MocMakes team. MocMakes makes the free Laser SVG Checker linked on this page. Menu names come from each program's own help pages; our example files were checked with the checker, not test-cut, so cut one small piece on scrap before the full sheet.
Why it happens
The beam removes a thin line of material on each cut (the kerf), and heat chars the wood next to it. A strip that looks fine on screen comes out thinner, darker and weaker. Script letters that only just touch, dots on i and j, and fine lattices are the usual places.
How thin is too thin depends on the material. Online cutting services publish rules of thumb: SendCutSend's guidelines ask for bridges at least half the material thickness, and Ponoko's metal guide says a bridge as wide as the material is thick. Our checker uses 1.2 mm by default and 1.5 mm for small ornaments or brittle wood. For 3 mm plywood that puts a sensible bridge at 1.5 to 3 mm. A test cut on your material settles it.
How to check
- Zoom in where two cut lines run close together and measure the gap with your program's measure tool or by drawing a small rectangle across it.
- Look for parts that are not connected to anything: they fall out by design, not because a bridge broke.
How to fix it by hand
- Inkscape: make the cut-outs smaller rather than the outline bigger. Select a window and use Path > Inset (Ctrl+( ); the step size is set in Preferences. Or move the nodes on each side of the strip apart with the Node tool.
- Illustrator: select the cut-out and use Object > Path > Offset Path with a negative offset to shrink it.
- LightBurn: Tools > Offset Shapes grows or shrinks a shape by a set distance. Separately, LightBurn's Tabs / Bridges feature (with Beginner Mode off) leaves small uncut tabs so parts stay in the sheet until you snap them out; that is a different job from a design bridge.
- Script names and stencils: weld the letters so they overlap rather than touch, and give dots a real connection. See script fonts for laser cutting names.
Or check your file free in 10 seconds
Drop your SVG into the Laser SVG Checker. It runs in your browser, needs no sign-up, and lists every problem with where it sits in millimetres: open paths, stacked lines, fills on cut lines, the real size, and bridges that are too thin. Many of them it can fix for you.
Questions
How thick should bridges be in a laser cut design?
As a starting point, at least half the material thickness, and more for brittle wood or small hanging pieces. For 3 mm plywood, 1.5 to 3 mm is a safe range. Test on scrap.
Why do small parts fall out after laser cutting?
Either they were never connected (a dot or letter counter that sits on its own), or the bridge holding them was thinner than the kerf and heat could survive. Connect them or widen the bridge.
What is the difference between a bridge and a tab?
A bridge is part of the design that keeps a piece in one part. A tab is a small gap left in a cut on purpose so the part stays in the sheet until you break it out.
More fixes for laser files
- Laser engraves instead of cutting: fills, line width, open paths
- Laser cuts the same line twice
- SVG imports at the wrong size
- Convert an image to SVG for laser cutting
- Laser cutting double lines from a traced image
- Laser Studio: describe a design or drop a picture, get checked SVG, DXF and PDF files in mm